Buyers decide in seconds whether to book a showing. When your Massapequa home looks great online, you earn more clicks, more tours, and stronger offers. If you feel overwhelmed by what to do first, you are not alone. This guide gives you a simple, local plan to get photo-ready fast and keep showings smooth. You will learn what to prioritize, how to time exterior work on Long Island, and how to highlight what local buyers value. Let’s dive in.
Why photos and staging matter
Most buyers start online, and photos drive their decisions. According to the National Association of REALTORS’ buyer research, shoppers rate listing photos among the most useful parts of their search, which directly impacts how many showings you get and how quickly you sell. You can review the buyer insights in the NAR Profile of Home Buyers and Sellers.
Staging also helps. The NAR Profile of Home Staging reports that staged homes tend to sell faster, and agents often see offers improve by 1 to 10 percent. Focus your effort on the living room, kitchen, and primary bedroom, since buyers notice these spaces first. See the stats and room priorities in the NAR 2025 Profile of Home Staging.
In Massapequa, buyers value commuter access, reputable public schools, and a coastal suburban lifestyle. That means you should showcase convenience to the Massapequa LIRR station, proximity to South Shore parks and beaches, and a clean, move-in-ready feel. When your photos and description reflect these priorities, you attract the right buyers faster.
Plan your timeline
Here is a simple 7-day plan that works for most “ready to move” sellers. Adjust as needed for contractor schedules or weather.
- Day 7: Walk-through with your agent, confirm priorities, schedule contractors and a photographer. If you are making any exterior changes or using signs, review permit and sign rules with the Town of Oyster Bay Building Division.
- Day 6: Declutter closets, counters, and the garage. Box and store extras so surfaces are clear.
- Day 5: Deep clean the whole house. Windows, floors, and bathrooms should sparkle.
- Day 4: Finish minor repairs, touch up paint, and complete yard clean-up.
- Day 3: Stage and style the living room, kitchen, and primary bedroom.
- Day 2: Photo day. Capture exteriors first in good light, then interiors.
- Day 1: Final clean, lights checked, temperature set, and staging refreshed for showings.
Priorities before photos
Tackle high-impact, low-cost tasks first. These steps create better photos and a stronger first impression.
- Deep clean and declutter. Remove personal photos, kid toys, and collections. Clear surfaces so rooms feel larger. NAR staging guidance ranks decluttering among the most important steps.
- Complete easy repairs. Fix loose knobs, squeaky doors, running toilets, and burned-out bulbs.
- Stage key rooms. Style the living room, kitchen, and primary bedroom with neutral linens and simple decor. The NAR staging report highlights these rooms as the top priorities.
- Optimize lighting. Use consistent, warm bulbs to avoid dark corners in photos.
- Prepare for professional photos. A skilled real estate photographer can improve views and buyer engagement. Ask for interior shots with balanced exposure and a twilight exterior if your facade looks best at dusk.
Exterior prep for Massapequa
Long Island’s coastal climate brings humid summers and cold, sometimes snowy winters. Plan exterior work around the weather so your photos look their best. Climate normals for Islip show clear seasonal swings. Review local climate context in the NWS Islip climate almanac.
- Aim for spring and summer exterior photos when landscaping is green.
- If listing in winter, focus on bright, cozy interior photos and schedule an exterior reshoot if snow or salt residue hurts curb appeal.
- Choose salt-tolerant, low-maintenance plants for front beds and touch up turf patches that stand out in photos.
- Power-wash siding and walkways, clean gutters, and refresh or replace your mailbox and house numbers. Industry cost-vs-value data consistently ranks these as smart updates. See project examples in this Cost vs. Value overview.
Local note: Permits and sign rules can vary by village. For any structural exterior changes or questions about open house and directional signage, contact the Town of Oyster Bay Building Division or your Village Clerk before you start.
Room-by-room checklist
Below is a photo-first plan for each space, followed by quick staging ideas to make showings feel welcoming.
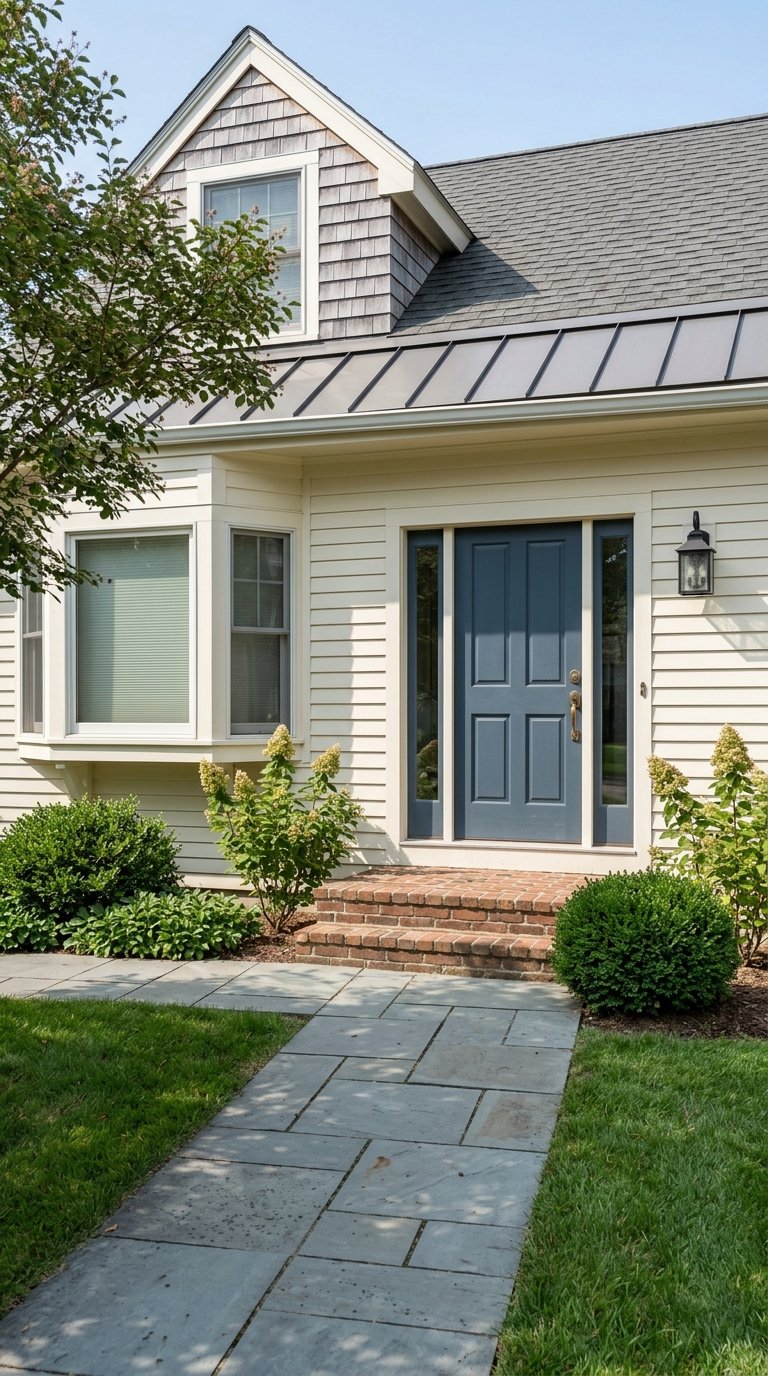
Entry and front door
- Must-do: Clean and repaint or touch up the front door, polish or update hardware, power-wash steps and walkways, clear cobwebs, and make sure house numbers are clean and visible. Small curb updates often have strong perceived value. See examples in the Cost vs. Value overview.
- Photo tip: Add a simple, neutral doormat and two matching planters. Shoot in soft morning or late-afternoon light.
- Quick staging: Keep the porch clutter-free. Turn on entry lights for warmth.
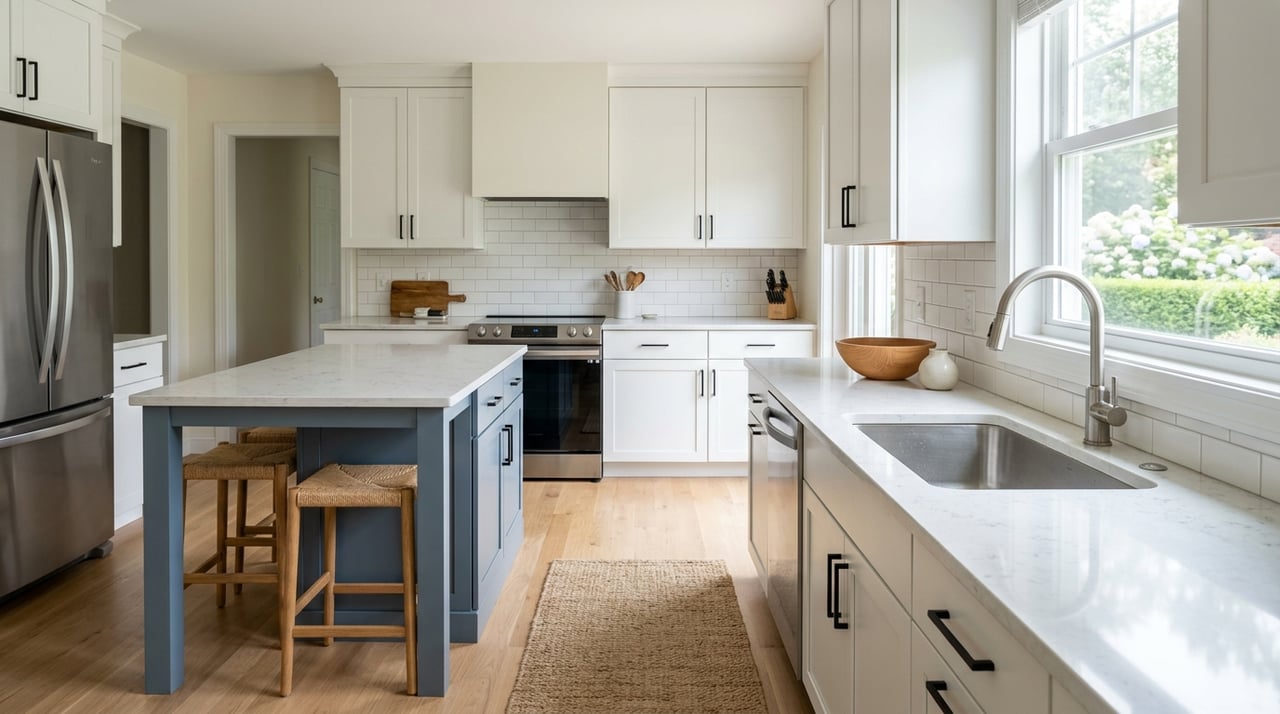
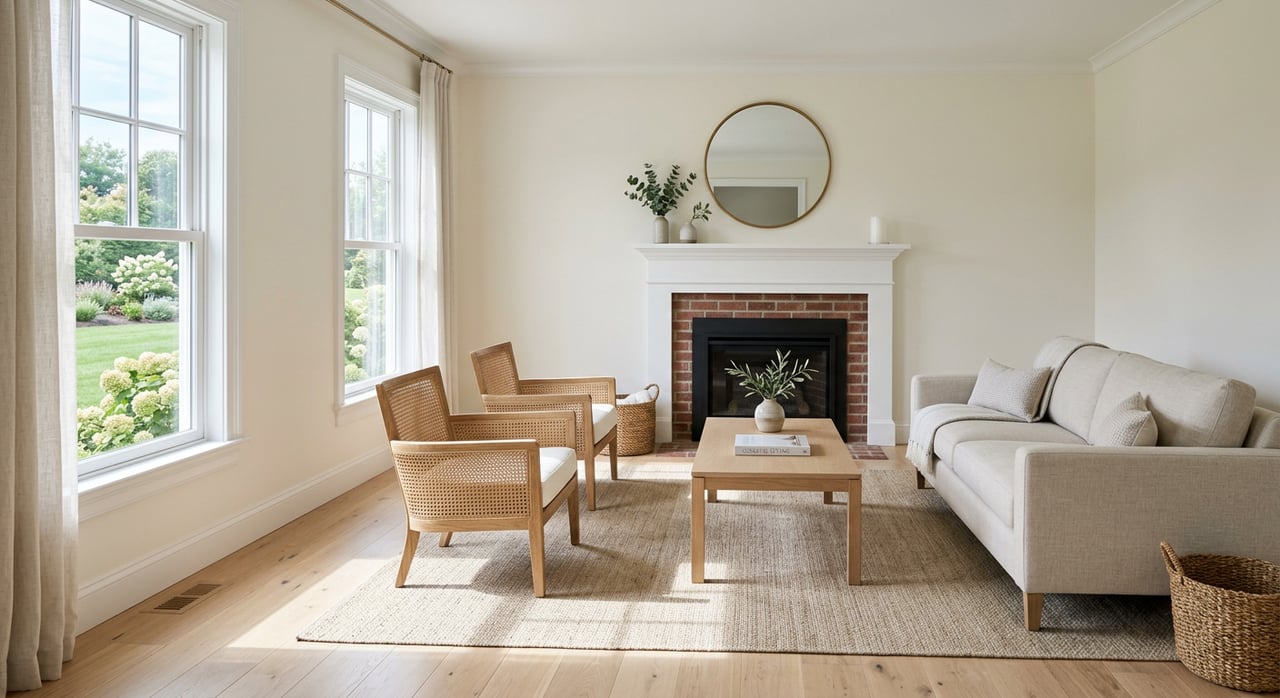
Living room or family room
- Must-do: Remove extra furniture to show floor space. Clear surfaces, hide personal items and cables, and deep clean floors and rugs. NAR ranks the living room as a top staging priority in the Home Staging Profile.
- Photo tip: Open shades, turn on all lights, and shoot from a corner to show depth.
- Quick staging: Add a simple coffee table vignette and a neutral throw to soften the look.
Kitchen
- Must-do: Clear counters, leaving one or two styled items like a bowl of lemons or a small plant. Clean appliances inside and out, degrease the hood, and replace any broken pulls or hinges. The NAR staging report highlights the kitchen as a focal point.
- Photo tip: Frame the workspace and views into dining areas. Keep sink, stove, and counters spotless.
- Quick staging: Use one fresh towel at the oven and a simple centerpiece on the table.
Primary bedroom
- Must-do: Depersonalize, use a neutral duvet and shams, remove bulky furniture, and tidy closets since buyers will open them. The primary bedroom is one of the top rooms to stage in the NAR report.
- Photo tip: Center the bed, straighten linens, open shades, and turn on bedside lamps.
- Quick staging: Add two matching pillows and a small plant or book on the nightstand.
Bathrooms
- Must-do: Scrub grout, swap worn towels for fresh neutral sets, clear counters, shine mirrors and fixtures, and fix any drips or runs.
- Photo tip: Use a wide lens carefully to avoid distortion. Remove personal items and leave one small decor piece.
- Quick staging: Add a simple white shower curtain and a clean bathmat.
Home office or bonus space
- Must-do: Define the use with a desk, chair, and lamp. Remove paper stacks. Strong Wi-Fi and good lighting appeal to remote workers. NAR buyer research supports online-first and remote-friendly features in the Buyer and Seller Profile.
- Photo tip: Highlight windows or built-ins. If the room is small, show the most flexible angle.
- Quick staging: Add a small plant and a neat notepad to suggest productivity.
Basement and garage
- Must-do: Clean floors, box and store items, check for moisture, and run the sump pump if you have one. Coastal homes benefit from clear proof of dryness and working mechanicals, especially in wetter seasons documented in the NWS climate normals.
- Photo tip: Photograph finished areas that are bright and tidy. Skip unfinished areas unless they are clean and dry.
- Quick staging: Use bright bulbs and a clean storage system to show capacity.
Media plan for listing day
A clear media plan ensures your best features show up first online.
- Photographer brief: Request at least 20 to 30 images. Identify three hero shots up front, usually the front exterior, the living room, and the kitchen. Ask for a twilight exterior if your facade looks great at dusk.
- 3D tours and video: For higher price points or commuter-focused listings, add a Matterport style 3D tour or a simple walkthrough video. The NAR buyer report shows that online features help remote buyers feel confident, which can expand your reach beyond in-person showings. Review insights in the NAR Buyer and Seller Profile.
- Photo sequence: Capture exteriors and main living spaces first in the best light. Then move to bedrooms and bathrooms. Finish with specialty areas so staging stays fresh.
Showing day routine
Create a simple pre-show checklist and repeat it every time so the home presents consistently well.
- One hour before: Open all window coverings, turn on every light, set the thermostat to a comfortable temperature, hide pet items, remove trash, and neutralize odors with fresh air.
- Safety and privacy: Put away prescriptions and valuables. Store documents and mail.
- During the showing: If possible, leave the property. Keep a small basket by the door with spare keys, info sheets, and emergency contacts to make hosting easy.
Local highlights to feature
Help buyers picture daily life in Massapequa by pointing out nearby conveniences and amenities.
- Commuting: Mention proximity to the Massapequa LIRR station for NYC access.
- Schools: If applicable to your location, reference the Massapequa Union Free School District as part of your area overview. Use neutral, factual language and confirm attendance zones.
- Coastal lifestyle: If photos allow, include a few tasteful outdoor images that nod to South Shore parks and beaches, like a sunlit backyard, patio, or neat path to a local green space.
Ready for a calm, well-run listing process that showcases your home the right way from day one? Get hands-on help with staging strategy, professional photos, and a step-by-step launch plan with Kerry Wolfson.
FAQs
Do I need to stage every room in my Massapequa home?
- Focus on the living room, kitchen, and primary bedroom first, then micro-stage other spaces if time and budget allow, as supported by the NAR Home Staging Profile.
When should I schedule photos around touch-ups and weather?
- Complete all cleaning, repairs, and staging before photos, and plan exterior images for clear spring or summer days when landscaping looks its best, with winter interiors prioritized if snow covers the yard.
Will professional real estate photos really help my sale?
- Industry studies show that professional photography drives more online views and stronger interest, which can lead to faster sales and better outcomes in competitive markets like Massapequa.
How clean is “clean enough” for showings?
- Aim for hotel-level clean: clear counters, dust-free surfaces, spotless bathrooms and windows, and fresh-smelling rooms with no visible clutter.
Do I need permits for small exterior updates before listing?
- Some changes and signage can require permission, so check with the Town of Oyster Bay Building Division or your Village Clerk before starting exterior work or placing signs.